How to make an Old School Skateboard
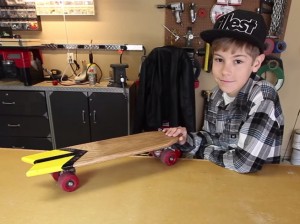 Connor had been asking me for months to make an Old School Skateboard that he could hang on the wall in his room as decoration (but of course it had to be ridable!). I eventually agreed when him and my wife came home with a $2 antique roller skate from a local antique mall.
But why do we call it an Old School Skateboard? Well put simply, modern skateboards are purpose built with specific trucks and shape formed laminated wood. Back in the old days, if you wanted a skateboard you had to make your own out of whatever you could find. In most cases a piece of scrap lumber and roller skate. Many times the roller skate was just nailed on and the whole thing could be quite dangerous.
Download the Old School Skateboard Plans Here!
The Materials
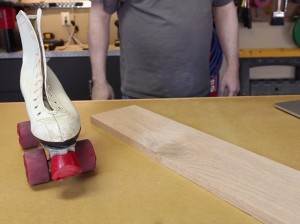 Our board is made out of a piece of scrap 4″ x 3/4″ oak board in my scrap pile. You can literally use any board you want, but if you like this exact board you can get it from Home Depot for about $12 (3/4″ X 4″ X 6′).
Try to find a board or scrap that doesn’t have any knotholes as they will likely pop out under stress leaving you with a hole in your board. Now we don’t want that!
Finally, the roller skate itself was a $2 roller skate from an antique mall. It did not even come with its mate and the shoe was completely worn out. But honestly all that matters is that it has good bearings and the wheels are in good shape.
The Design
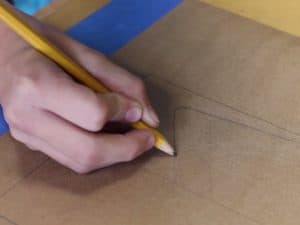 Our design was pretty simple. I let Connor come up with it on his own. The best way is to take some brown paper used for paint masking and just trace the rectangle of your board onto it. Then inside that rectangle experiment with different designs. You’ll probably want an eraser handy! You could also draw your design in Sketchup or Illustrator and then print it out if you prefer. We did ours by hand. I recommend drawing just half of the board and folding it over (as seen in the video) to make the other side. This insures you have a perfectly symmetrical board design.
Cutting out the Board
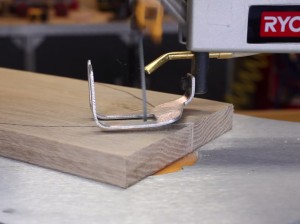 I used a scroll saw to cut out the board shape because I didn’t have a bandsaw at the time. A jigsaw would work well for this too, but be sure to clamp the board down to something solid first. Cut about 1/16″ to 1/8″ outside the line then use a sander (preferably a belt sander) to bring the design down to the line. This will result in a perfect fit. You’ll also want to use this opportunity to round over all of the sharp corners for looks and safety.
After sanding I used a router with a 1/4″ round-over bit to smooth off all the sharp edges. Routing is completely optional but we felt like it made it look a lot nicer.
Finishing the Board
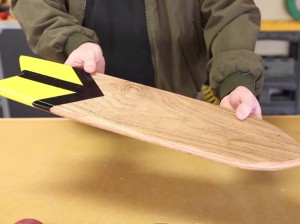 You’ll probably want to finish your board with paint and stain. We chose to put a nice little tail design with spray paint and cover the whole thing with Minwax wipe-on polyurethane.
Many of you will want to also install grip tape or sprinkle sand into the paint/polyurethane for gripping your shoes. Since this board was mostly going to be a display piece we skipped that.
I highly recommend letting the finish cure for at least a week before riding it regardless of what the instructions say.
Installing the Trucks
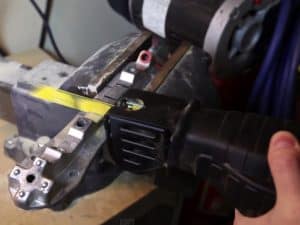 You’ll want to remove the trucks from the roller skate. In most cases this will mean removing four locknuts from the bottom. I used a reciprocating saw (some call them a sawzall, but that’s really a brand name) to cut about 3 1/2″ out of the center of the truck plate. You could just cut it in half and be done, but the truth is I just thought it would look better to get rid of some of the excess metal. If you don’t have a reciprocating saw, you can just use a handheld hacksaw.
You’ll also probably need to drill a few holes depending on the design of your trucks to use for mounting holes. In my case I only had two holes on each end, so I added two more (four holes total on each truck). Also again for safety I recommend that you use a bench grinder or a file to remove any burs from the metal.
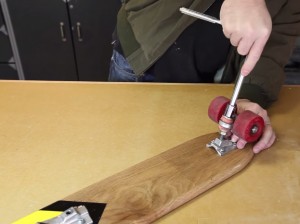 Using a screwdriver and a wrench to install the trucks on the bottom of the board is all that remains. Be sure not to over-tighten and strip out the threads in the wood. This is especially true if you used pine or a softwood.
Be sure to be safe and never ride your Old School Skateboard in a dangerous place (such as the street or parking lots).
If you make a board be sure to send me some pictures of it!
Also, if you liked this project, you’ll might also like our Skateboard Rack project too!
Get the PDF plans and Sketchup File
Video Transcript
Watch the video on YouTube: How to Make an Old School Skateboard
Hey Guys, It’s Mike from The Geek Pub! And Connor! We’re going to show you how to make an old school skateboard, right in your garage!
In the old days, you couldn’t just drive dive to your local big box store and buy a skateboard. You had make your own!
To make our old school skateboard we’ll need a roller skate and a piece of scrap lumber. In this case, oak. Look for an old roller skate at an antique mall, and try to find one with good bearings. On piece of paper larger than our board, draw a design for your skateboard. It can literally be any shape you want, so have fun with it. Only draw half of it though, because we’ll flip it to make the other side. Now, cut out the half pattern carefully using some sharp scissors or a knife.
Find the exact center and then draw a line down the center of the board. We’ll use this line and a piece of tape to attach our paper template to the board. Then using a pencil, carefully trace the paper pattern onto one half of the oak board. When you’re finished, carefully turn the board around and flip the pattern over. You can then trace an exact mirror image of our pattern on the second half.
Now using a scroll, band or jigsaw, cut out the pattern from the oak plank. Take your time and go slow, but don’t worry too much about accuracy here. Just cut about 1/8” to the outside of line to leave room for sanding and clean up work. Using a belt sander, gently sand the board to the template lines. You’ll also want to use this opportunity to gently round all of the sharp corners. If you want a nice look, it’s really important to take your time and slowly refine the pattern.
Using a router with a round-over bit take the edges off of the board. You’ll want to flip the board, and round-over the bottom side too for a really clean look. Then gently hand sand the whole board. And after a little paint and stain of your choosing your board should look something like this.
Now take that old roller skate and remove the plate and trucks from the bottom of it. It should just be 4 lock-nuts or similar. Once you’ve removed it from the shoe, remove the trucks from the plate. Put it into a bench vice and cut the center section of the plate, but don’t cut into any of the supports or slots for the trucks. Then remove any burs or sharp edges using a standard bench grinder and wire wheel.
To attach our newly halved plates to the board, we’re going to need two addition screw holes on each one, so drill those out using a drill press. Mark and pre-drill 8 holes on the bottom side of our board. Then using some large pan-head screws attach the plate sections tightly, but be careful not to strip out the oak board.
Finally, reattach the trucks to the plates, and that’s it! You’ve got your very own old school skateboard! and Connor can’t wait to try it out! Well that’s it for this episode. If you liked this video, please like, subscribe and comment below if you have an idea for a future project!
The post How to Make an Old School Skateboard appeared first on The Geek Pub.
